How To Make A Website To Sell Products In 5 Practical Steps
Covered every detail to answer your question on how to make a website to sell stuff, from technicalities to best practices, step by step.

Published: August 12, 2025
Updated: January 13, 2026
Let’s start with why you should build your own website to sell stuff. You can hire someone to build a site for you, right? And, I’m not saying that’s a bad thing at all. A professional website builder knows what to do and how to do it fast. But there are a few very valid reasons to know how to make a website to sell your products. We will get to that.
How to make a website to sell products
Building a website has a bit of a learning curve, and building one to sell products has a longer checklist. I have simplified it into 5 steps. At the end of this course, we will try to shed some light on a few questions that you might ask, like;
How much does it cost to make a website to sell stuff?
Can you make a website to sell stuff for free?
But first, let’s go through the steps and let’s understand what’s coming next. One more thing, it could be useful for the future, so it will be easier for you if you bookmark it. All set? All right, let’s start.
Step 1: Set the Foundation
This is where everything begins. In this stage, you’ll get your domain, hosting, and WordPress installed. It’s all about setting up the ground where your store will live.
Step 2: Design Your Website
Now that your site is live, it’s time to make it look like your brand. This stage is focused on theme setup and customizing the design using WordPress’s block-based Site Editor.
Step 3: Build Your Storefront
This is where your website becomes a real store. We’ll install FluentCart, add your products, and set up how you’ll accept payments and handle shipping.
Step 4: Optimize & Prepare for Launch
Your store is built, now it’s time to polish it. This step is about testing everything, getting search-ready, handling legal must-haves, and making sure you’re good to go live.
Step 5: Scale & Maintain
The journey doesn’t stop after the first sale. In this stage, you’ll focus on growing your business and solving issues as they come up. Long-term success starts here.
Each step will have multiple modules for you to understand and track easily. But before we get to the details of how to make a website to sell, let’s discuss the ‘why’ first.
You should build your website
Building a website comes with a bit of a learning curve, and no, I’m not talking about coding. This content is here to help you walk through that curve with no coding, step by step. And here’s what you get in return:
First, financial freedom. Hiring a pro can be pricey, and when you’re just getting your business off the ground, you’ve already got a long list of expenses, from creating quality products to handling shipping, delivery, and stock. Managing the website yourself means one less thing to outsource, giving you a real upper hand.
Second, in the early days, there was a lot of testing, experimenting, and iterating involved in finding the perfect brand experience. If you’ve built the site yourself, you can apply changes on the fly, without waiting on someone else to update a font, change a section, or fix a button. You’re in control, and that speed can make a big difference.
And finally, when the business grows and you do need to bring in a developer, you won’t feel lost. You’ll already understand how the site works, which makes communicating with a dev way easier. You’ll give better instructions, ask smarter questions, and avoid getting stuck in technical gaps. So, in the long run, it’s a total win-win.
So, on that note, we have created this step-by-step course for you and tried to cover every point with the best practice. Let’s start.
Step 1: Set the Foundation
This is the first step of the answer to how to make a website to sell has 3 modules to complete the initial ground for your store.
1. Choosing Your Domain and Web Hosting
2. Installing WordPress
3. Basic WordPress Configuration
1. Choosing Your Domain and Web Hosting
Your hosting provider serves as the foundation of your online store, making it one of the most critical decisions you’ll make in this journey. For an e-commerce site, reliable uptime, fast loading speeds, and secure data handling aren’t just nice-to-have features; they’re mandatory for building customer trust and driving sales.
A domain name is a vital element for a site. So, the domain name, hence the brand name, should be memorable, easy to pronounce, and easy to spell. Usually, common names for stores can be tough to find and are often expensive. But a bit of tweaking on an original name or a unique name might be cheap. Always try to buy the domain from the hosting provider, as it will help skip all the DNS configuration, which can be tricky if you are not a developer or DevOps.
Among the top hosting providers for WordPress e-commerce, Bluehost is recommended by WordPress. Hostinger is a solid choice for WordPress and offers a particularly beginner-friendly experience. Initially, shared hosting is good to go. But if you are planning to launch a large store, then you might check VPS, both above-mentioned providers offer VPS service.
Cloud hosting can be an option if you know the volume of the product and traffic will be large. AWS, Azure, and Google Cloud, all of these major cloud service providers, offer services for WordPress sites.
When evaluating hosting providers for your WordPress e-commerce site, you’ll want to ensure they include an SSL certificate, which is absolutely essential for secure transactions. Look for providers that offer SSD storage rather than traditional hard drives, as this significantly improves loading times. Daily backups will protect your store data, while 24/7 support ensures you’ll have help when you need it most. WordPress optimization features will give your site better performance right out of the gate.
To set up your hosting, start by visiting your chosen hosting provider’s website and selecting a WordPress hosting plan. During the signup process, you’ll choose your domain name, which becomes your store’s web address. Complete the registration and payment process, then check your email for hosting account details. Once you receive these credentials, you can access your hosting control panel.
Most modern hosting providers offer one-click WordPress installation, which we’ll use in the next module to get your site up and running quickly.
2. Installing WordPress
The easiest way to install WordPress is through your hosting provider’s one-click installation option, which most modern hosts provide. Even if you are installing WordPress on a VPS or a cloud server, all the providers offer an easy wizard to install WordPress.
Log in to your hosting control panel and look for an option labeled “WordPress” or “One-Click Install.” Select your domain name from the dropdown menu and then just follow the wizard setup. For most providers, it’s very straightforward.
If you are using a VPS or a cloud server, you might need to link the domain name with the server later on. You will find documentation on the provider’s website on how to direct the name server to the host server. It’s not that complex anyway. You will find lots of videos as well on YouTube.
Now that WordPress is installed, you will go through the WordPress setup process. You’ll need to create an admin username and password. Make sure the password is hard enough to crack and then write these down in a safe place, as you’ll need them to access your WordPress dashboard later.
Enter your email address, which WordPress will use for important notifications about your site. Click the install button and wait for the process to complete.
If your hosting provider doesn’t offer one-click installation, you can install WordPress manually by downloading it from wordpress.org. You have to create a MySQL database in your hosting control panel, then upload the WordPress files via FTP. However, manual installation is rarely necessary with modern hosting providers.
Once installation is complete, you can access your WordPress dashboard by going to yoursite.com/wp-admin and entering the username and password you created.
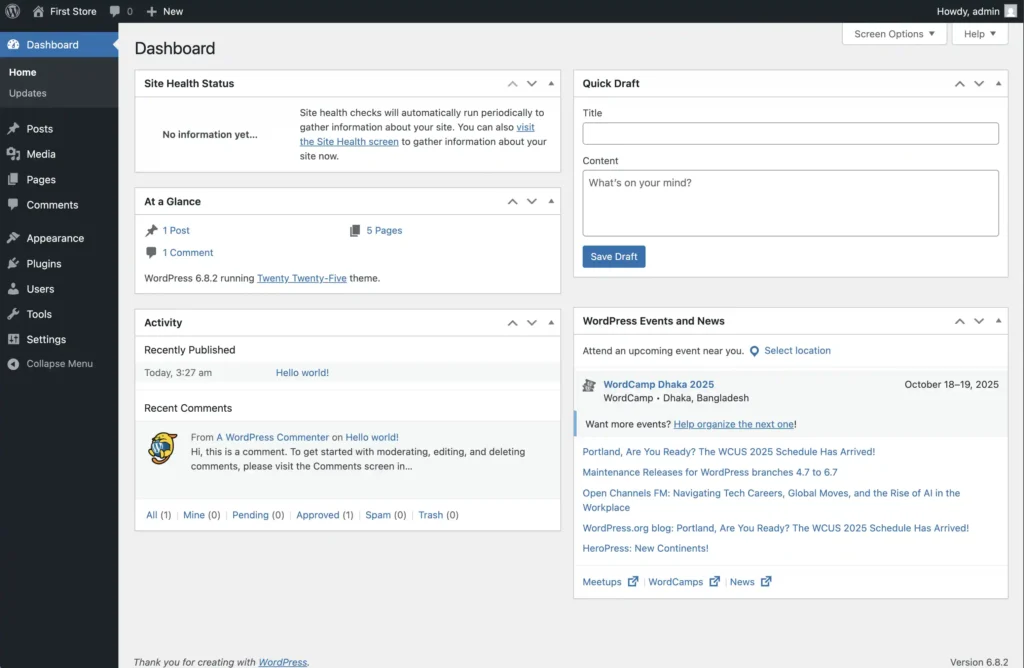
And with that, congratulations, you now have a working WordPress website ready for customization.
3. Basic WordPress Configuration
Before diving into design and e-commerce functionality, you’ll need to configure some essential WordPress settings that will affect how your site operates and appears to visitors.
Start by navigating to Settings and then General in your WordPress dashboard. Here you’ll set your site title, which should be your store name, and your tagline, which provides a brief description of what you sell. You also need to upload a favicon, which is usually the logo of your brand.
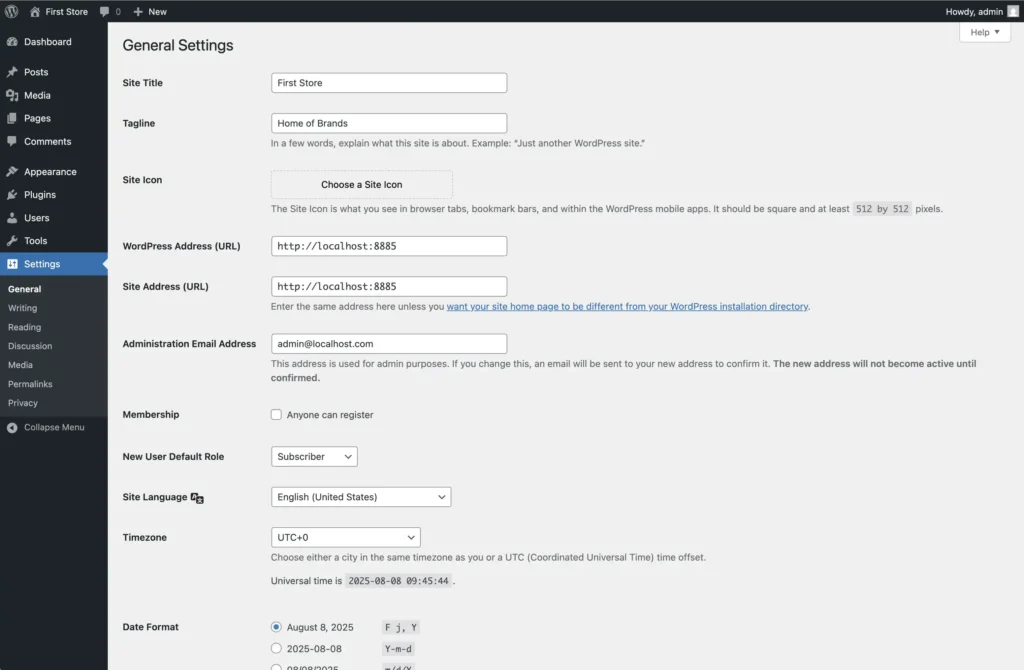
Choose your time zone to ensure order timestamps and scheduling features work correctly for your location. Set your preferred date and time format to match your regional standards.
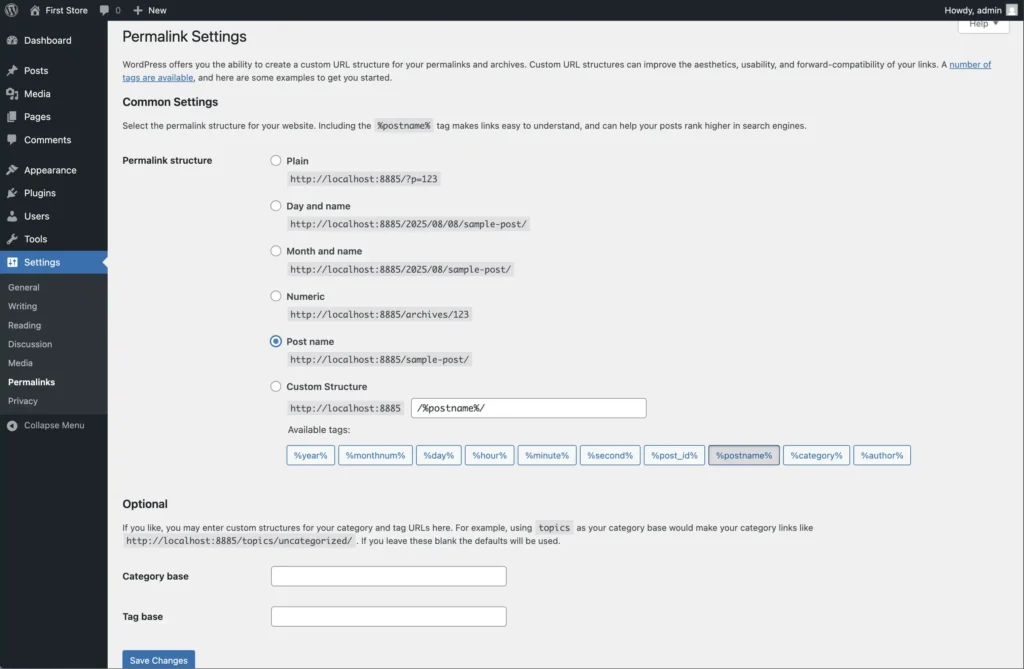
Next, visit Settings and then Permalinks to configure your URL structure. Select the “Post name” option, which creates clean, SEO-friendly URLs for your pages and products. This structure makes your URLs more readable for both visitors and search engines.
Now you’ll install some essential plugins that every e-commerce site needs. Navigate to Plugins and then Add New to access the plugin directory. Search for “Wordfence Security” and install it to protect your site from malware and hacking attempts. Follow the setup wizard to configure basic security settings.
Install “UpdraftPlus” for automated backups of your site. Regular backups ensure you can restore your store if anything goes wrong during development or after launch. Configure the backup schedule to run daily or weekly, depending on how frequently you update your content.
For search engine optimization, install “Yoast SEO” and run its configuration wizard. This plugin helps optimize your content for search engines and provides valuable insights into how well your pages and products are optimized for discovery.
From the Yoast plugin, you can create the Sitemap.xml file as well. You also need to create the Robots.txt file. This is also mandatory for search engine crawling. Finally, you will need the llms.txt file, which can be created by toggling it on in Yoast. This might help your site appear on AI chat, but this is not guaranteed yet.
You also need to install a cookie consent plugin called “Complianz” for cookie consent, and fair use of your store visitor data for marketing. This is mandatory by GDPR and other international data usage policies.
Step 2: Design Your Website
At this point, we will look into to design of the store, the most vital conversion element for an online shop. It has one module to work on.
4. Setting Up Twenty Twenty-Five Theme
4. Setting Up Twenty Twenty-Five Theme
If you are not familiar, WordPress has themes which basically define the website’s look, including layout design, color, font style and size, button design, and so on. You get the idea.
You will find a lot of themes for WordPress both on the WordPress repository and on marketplaces like Envato. There is a very good chance that you will find exactly what you are looking for. It’s possible because of this huge WordPress community.
For this blog, we are going to use the Twenty Twenty-Five theme built by the WordPress Theme community. It provides a modern, flexible foundation for your e-commerce store.
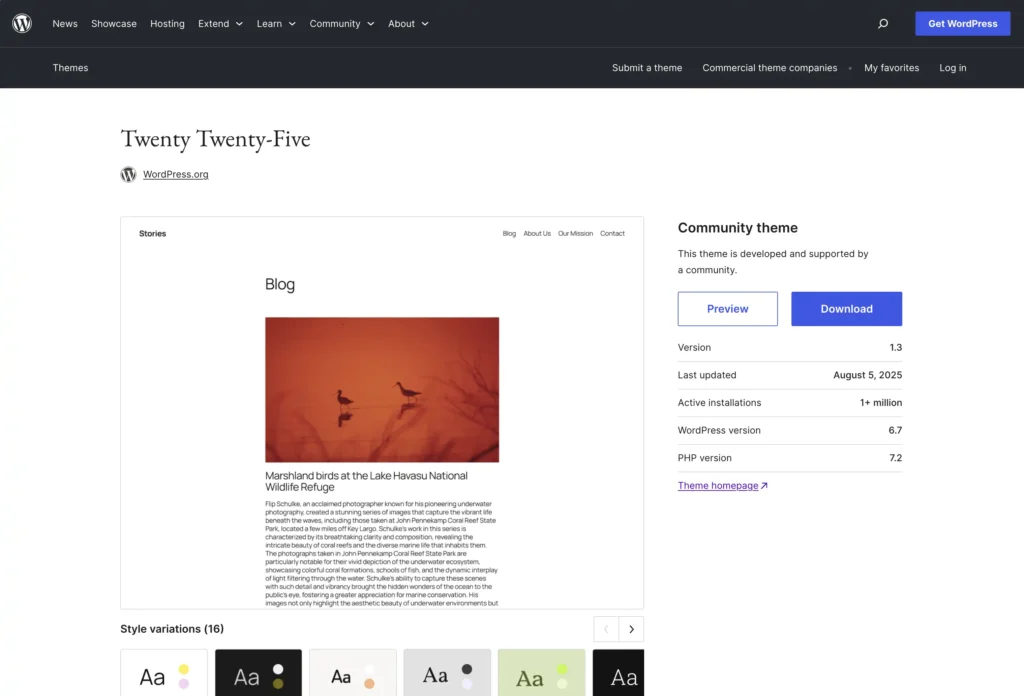
Usually, this theme will be installed out of the box. But if you want to go with some other theme, then go to Appearance and then Themes in your WordPress dashboard. Click Add New and search for what you are looking for. Install and activate the theme to make it your site’s active design.
But you will notice that the Twenty Twenty-Five Theme customization option is a bit different from the other popular themes. It’s because the Twenty Twenty-Five Theme is a block theme, and others are still using the legacy format. Which is fine, by the way.
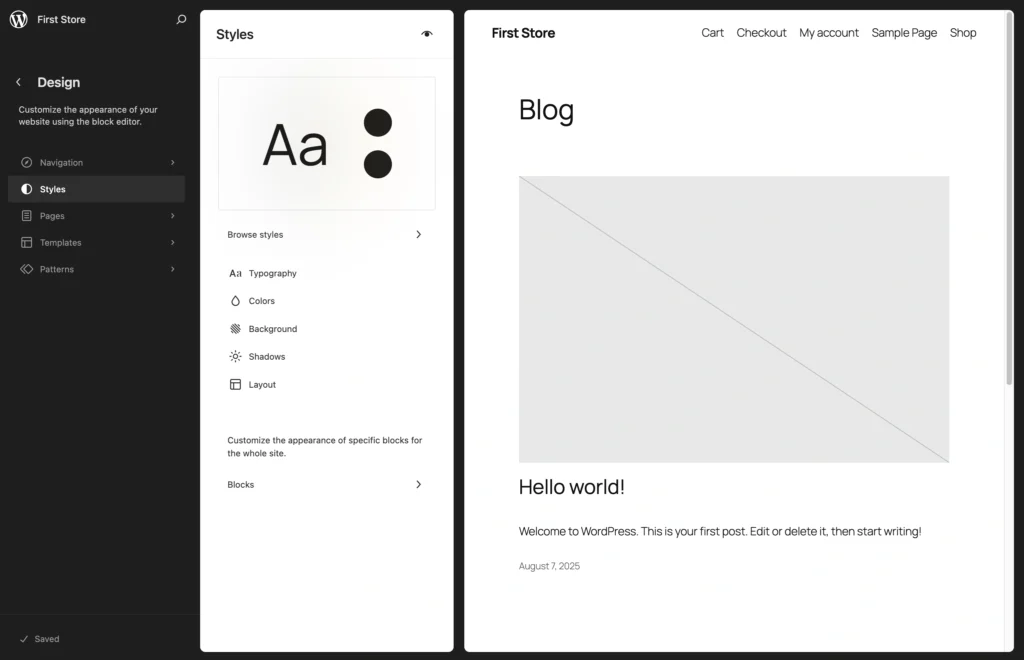
Once activated, you can customize the block theme by navigating to Appearance and then Editor. This opens the WordPress Customizer, where you can make changes and preview them in real-time.
Start with Site Identity, where you’ll upload your logo and set your site icon (favicon) here as well (if you did that already, then skip it). These visual elements help establish your brand identity and make your store look professional.
In the Style section, you set the total brand tone globally. Start by choosing colors that match your brand. Consistency in color choice helps build brand recognition and creates a cohesive shopping experience.
The Typography section allows you to select fonts that complement your brand personality. Choose fonts that are easy to read and reflect whether your brand is modern, traditional, playful, or serious.
Configure your layout settings to determine how your body, header, and footer appear. Set the container width to 1200px. The shop page should show all the products with more breathing space.
Consider what navigation elements are most important for your customers and make sure they’re easily accessible. You can create patterns with reusable small sections, which are globally accessible, and can create templates, which are dynamic page presets, like your blog page, archive page, or your shop, in this case.
In Settings under Reading, you can choose whether your front page displays your latest posts or a static page like a custom home page that you’ll design specifically as your homepage. You can also set the dynamic shop page as your homepage.
Creating essential pages is crucial for any e-commerce store. Navigate to Pages and then Add New to create your core pages. Your Home page serves as your main landing page, where visitors get their first impression of your store. An About Us page tells your story and mission, helping build trust with potential customers.
A Contact page should include your contact information and possibly a contact form for customer inquiries. For forms, you can use a plugin called FluentForms, a free contact form builder.
Furthermore, you can also add some other landing pages for your special deals or premium products for better traction and conversion.
Legal pages are particularly important for e-commerce sites. WordPress out of the box creates a Privacy Policy page as a draft, which you can edit to add your policies and hit publish to make it public. Do not forget to add it to your footer section. Terms of Service and Cookie Policy protect your business legally and set expectations for customers.
A Shipping Policy informs customers about delivery times and costs, while a Return Policy explains your return and refund process. These policies are one of the vital phases of the process of how to make a website to sell.
To help visitors navigate your site, create a navigation menu by going to Appearance, Editor, and then Navigation. From here, you can edit everything. You can also just click on the section, and it will open the edit option for you. Go ahead, click on the Footer and try to edit.
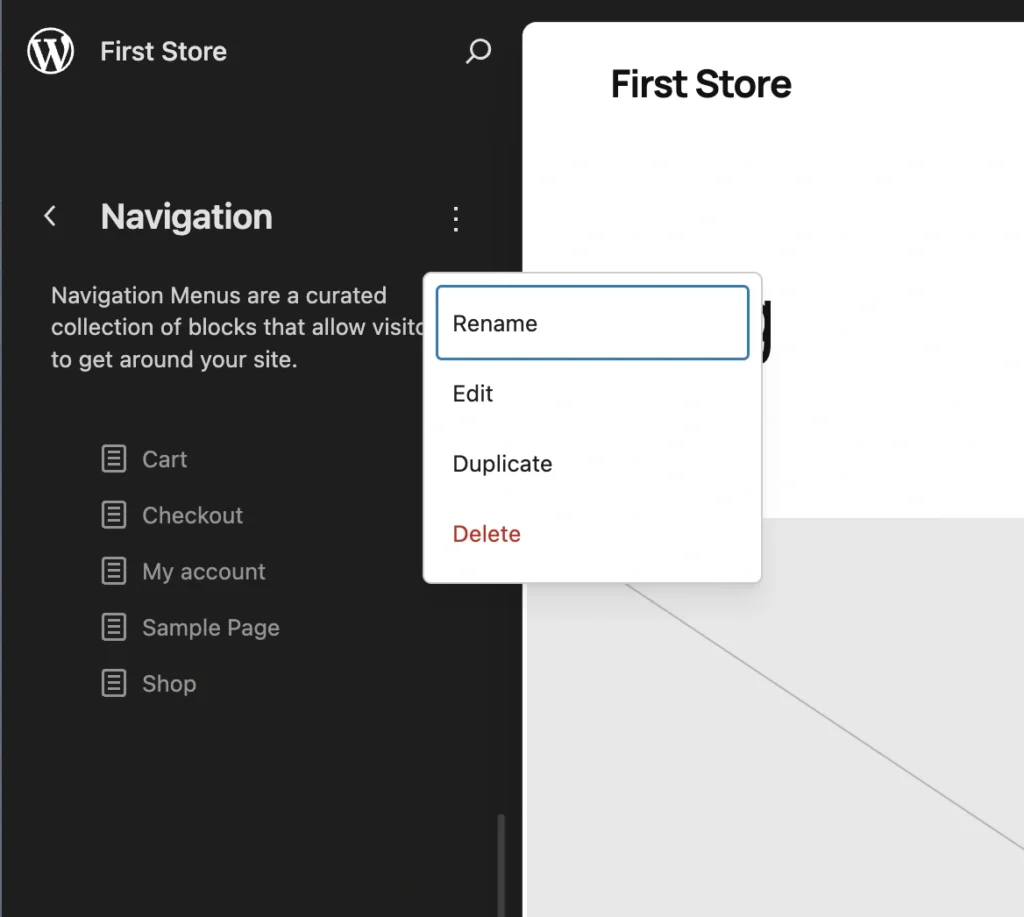
If you are not using the block theme, then you need to go to the Menu under Appearance. Create a new menu called “Main Menu” and add your essential pages to it. Organize the pages in a logical order, typically with Home first, followed by your main product page called Shop, then support pages like About and Contact. Assign this menu to your “Primary Menu” location and save your changes.
At this point, our initial design setup is done. But that’s the website. Later on, will design the store. But before that, we have some vital things to do in the next step.
Step 3: Build Your Storefront
Now we’ll set up the actual store system, the place where you can start selling and turn your dream business into reality. If you’ve been wondering how to make a website to sell, this is the step where it all comes together. The setup includes the following modules to get your store fully ready.
5. Installing and Configuring FluentCart
6. Adding Your First Products
7. Setting Up Payment Processing
8. Configuring Shipping Options
9. Customizing Your Store Design
5. Installing and Configuring FluentCart
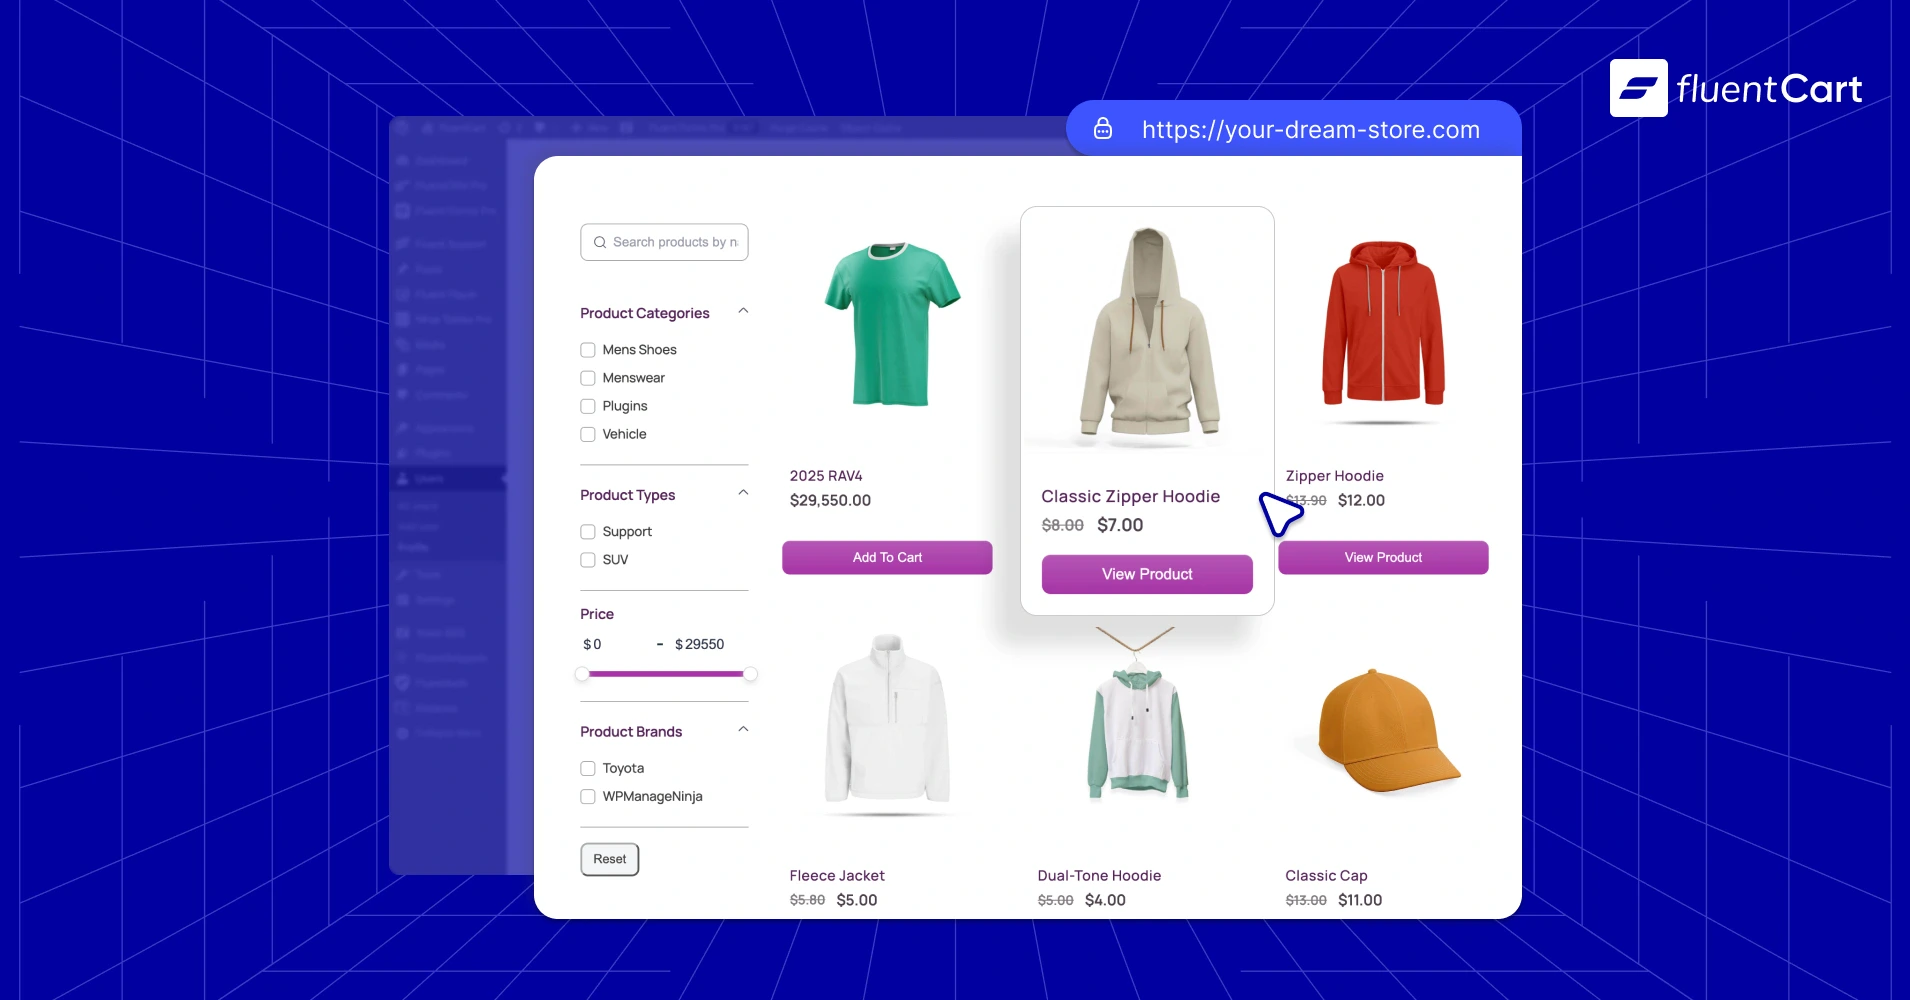
FluentCart is new in the market but offers several advantages that make it an excellent choice for new store owners. It’s lightweight and fast, resulting in better page loading speeds that improve both user experience and search engine rankings. So if you are thinking about how to make a website to sell stuff, then it’s a solid choice.
The setup process is easy and more streamlined, and it uses fewer server resources, which can save you money on hosting costs as your store grows.
It’s not released yet, but soon it will be available on the WordPress repository. Keep an eye on your inbox for the update.
To install FluentCart, navigate to Plugins and then Add New in your WordPress dashboard. Search for “FluentCart” and install and activate the plugin. Or if you are using the Pro version, you will have a zip file. Go to Add Plugin, click Upload Plugin to upload the zip file. You do not need to unzip it.
Once activated, you’ll notice a new “FluentCart” menu item in your dashboard, which provides access to all e-commerce functionality out of the box.
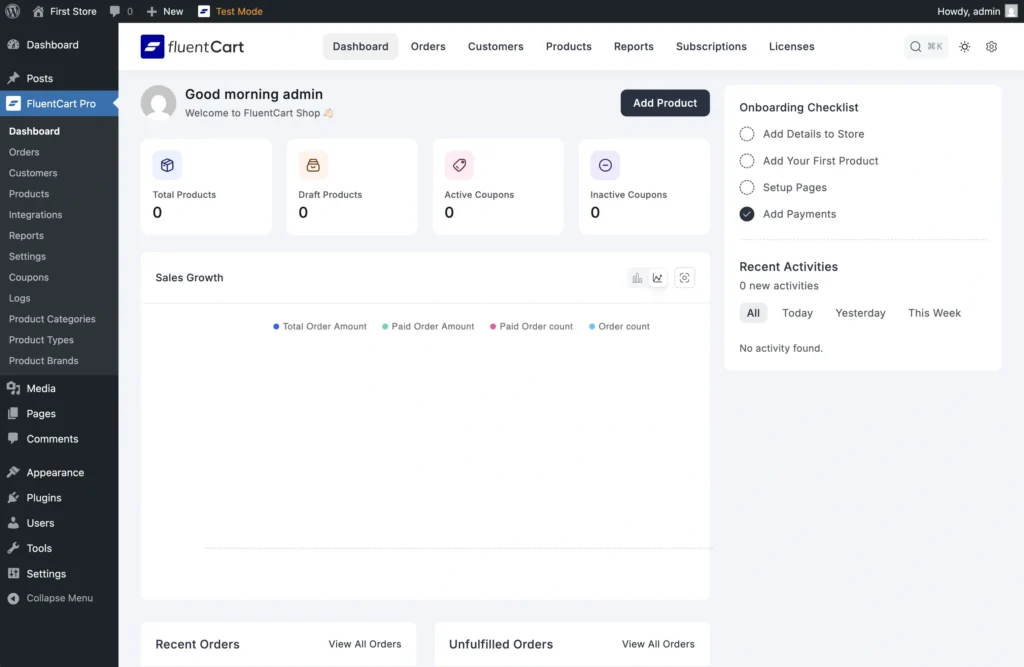
Click on FluentCart and then Settings to begin the initial configuration. In Store Settings, enter your store name, business address, and business logo, which will appear on invoices and customer communications. Configure your currency settings based on where you’re located and where you plan to sell. Assign pages for different dynamic information, like shop, cart, profile, and so on.
Configure email notifications so you’ll be alerted when orders come in. For advanced email communication, you can also install FluentCRM. It’s a powerful email marketing and communication tool out there. You can start with the free version without a second thought.
The Payment Settings section is where you’ll later configure how customers can pay for their purchases.
If you are selling physical products, then you need to set up a shipping method. In Shipping Settings, you’ll set up shipping zones and shipping classes based on where you plan to ship products. For example, you have two zones to ship: one is in the city, and another is outside of the city. You can set heavy and lightweight classes for two different zones with full flexibility.
Creating product categories, tags, and brands helps organize your inventory and makes it easier for customers to find what they’re looking for. Navigate to FluentCart and then click Categories, Tags, and Brands to create your structure.
You can create subcategories under the parent category for better organization. Consider categories like Electronics, Clothing, Home & Garden, Books, or Accessories, depending on what you plan to sell. Think about how your customers would naturally group and search your products. Do not create unfamiliar names for the category or tags.
6. Adding Your First Products
Before you start adding products to your store, gather all the information you’ll need for each item. This includes the product name and detailed description, high-quality product images from multiple angles, pricing information including any sale prices, weight and dimensions for shipping calculations, current stock quantity, and appropriate categories and tags for organization.
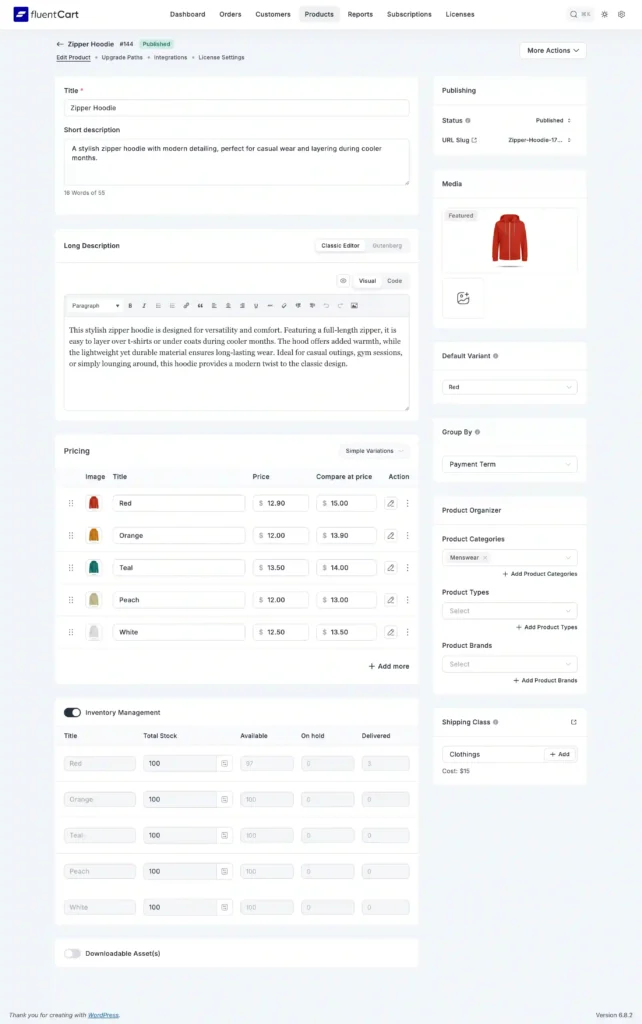
To add your first product, navigate to FluentCart and click on Add Product. It will ask if it’s a physical product or a digital product that you are going to sell. FluentCart handles both, even in the same listing. Enter your product title, which should be descriptive and include keywords that customers might search for. Then hit the Add button.
You will land on the product page. In the product description area, write detailed information about the product that helps customers understand its features, benefits, and specifications. Think about the questions customers might have and address them in your description.
Upload multiple high-quality images to the product gallery. Customers can’t physically examine your products, so images are crucial for conversion. Include photos from different angles, close-ups of important details, and if possible, lifestyle shots showing the product in use. Ensure all images are well-lit and show the product clearly.
If available, add variations of the product (in terms of size, color, shape, or other) in the same listing. There’s no need to create another product for the variations. Upload separate images for the variations as well. You will notice you can set subscriptions and licenses of the product as per variations.
Set your pricing in the appropriate fields, including regular price and sale price if you’re offering a discount. Set the inventory as per your current stock quantity. FluentCart will automatically prevent overselling when stock runs out.
For shipping calculations, enter the product’s class as on weight and dimension. Select the appropriate categories, tags, and brands for your product to help customers find it through browsing or easy filters on your shop page.
Consider adding SEO-friendly meta descriptions and an easy-to-read permalink, AKA the product URL. It will help search engines understand what your product is about. Once you’ve filled in all the necessary information, click Publish to make your product available for purchase.
I know I’m repeating this because this is vital for business. When preparing product images, use high-resolution photos of at least 1200×1200 pixels. Show your products from multiple angles and include lifestyle shots when possible. Maintain consistent lighting and backgrounds across all product photos to create a professional, cohesive look. Optimize your image file sizes for the web.
You can use .WEBP format for higher quality in a smaller size. You can also use a GIF file if needed to show your product in a better way. But it’s recommended to keep the file size of images at 100 KB or less. We are halfway there to how to make a website to sell products online.
7. Setting Up Payment Processing
Accepting payments securely is fundamental to any e-commerce operation. FluentCart supports several popular payment gateways to take payments globally or locally, depending on your business needs and customer preferences.
PayPal integration is often the easiest to set up and is widely trusted by customers. Navigate to FluentCart Settings and then Payments to enable PayPal. Enter your PayPal email address and choose between sandbox mode for testing and live mode for actual transactions. PayPal handles the payment processing on its secure servers, which reduces your compliance burden and gives customers confidence in the security of their transactions.
For credit card processing, Stripe integration provides a professional checkout experience where customers can enter their card details directly on your site. Create a Stripe account at stripe.com and obtain your API keys from the Stripe dashboard. In FluentCart’s payment settings, enable Stripe and enter your credentials. Configure webhook endpoints to ensure your store stays synchronized with Stripe’s payment records.
During development and testing, use Stripe’s test mode with their provided test card numbers. The test Visa number 4242 4242 4242 4242 will simulate successful payments, while 4000 0000 0000 0002 will simulate declined transactions. Use any future expiry date and any three-digit CVC code for testing.
You might also want to offer local payment options. You might need to take some help from a developer to do that. But your developer can handle that very easily, and FluentCart has all the needed webhooks to set up a custom payment gateway that’s not listed.
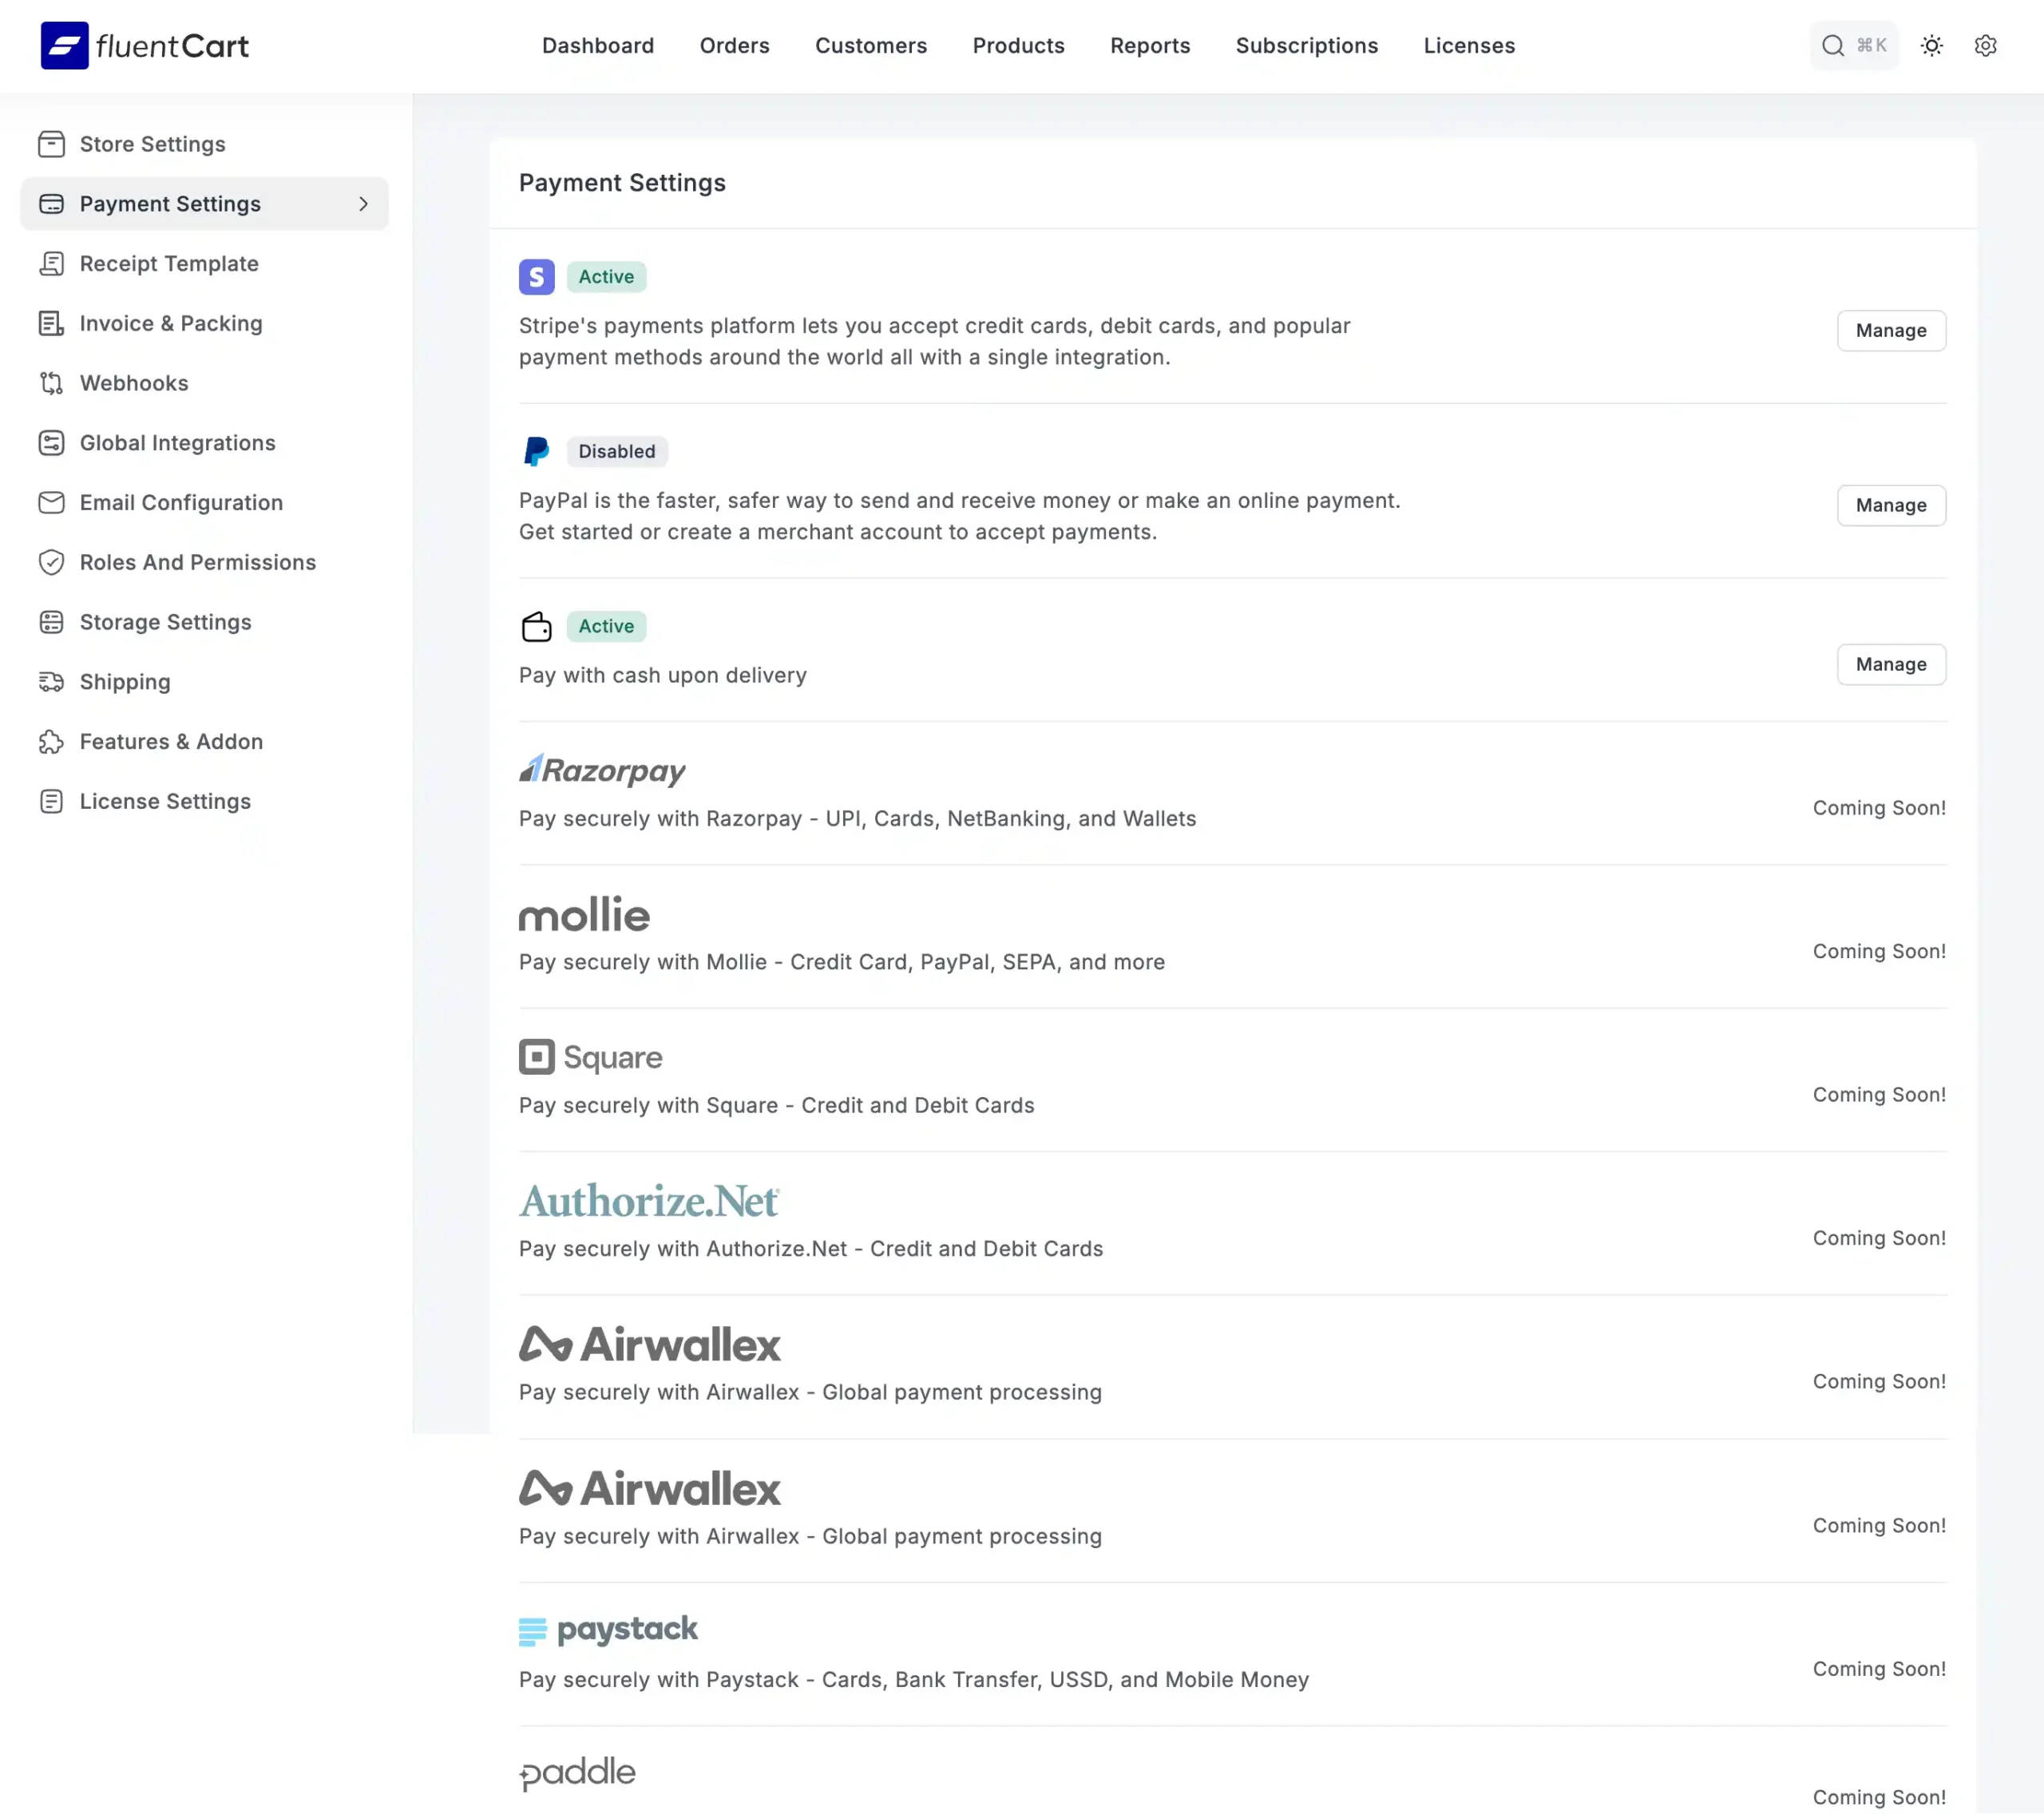
If your local customers are more comfortable with cash on delivery, then you can enable it, start selling, and process the orders manually as you like, taking the cash through your delivery person.
Payment security should be your top priority. Ensure your SSL certificate is installed and active. You can verify this by checking that your site loads with “https://” and shows a lock icon in the browser.
Only use reputable payment gateways that are already listed in FluentCart and never attempt to store credit card information on your own servers. That’s a felony. Keep your WordPress and all plugins updated regularly, and monitor your transactions for any suspicious activity. At this phase, I know things are getting a bit complex, but there is no easy answer to how to make a website to sell questions.
8. Configuring Shipping Options
Getting your shipping setup right isn’t just about getting products from point A to point B; it’s a huge part of creating a great customer experience and keeping your business profitable.
With FluentCart, this becomes straightforward thanks to shipping zones, which determine what shipping methods are available based on where your customers are located.
The best place to start is with a domestic shipping zone for your home country. In FluentCart, you can create one by heading to the Settings page, opening the Shipping tab, and clicking “Add Shipping Zone.” Give your zone a clear name, like “Domestic” or simply the name of your country, and then select your country in the zone regions.
Once that’s saved, you can begin adding shipping methods that make sense for your products and your business model. One of the simplest and most customer-friendly options is a flat rate shipping method. This charges the same amount no matter how big the order is or how much it weighs.
For example, you could set standard shipping at $5.99 for delivery within five to seven business days, or offer an express option at $12.99 for delivery in just two to three business days. Some store owners choose to take it a step further by offering free shipping, which can be a powerful sales booster.
It’s worth considering, especially for promotional campaigns or when the shipping cost can be absorbed into the product price.
If you plan to ship internationally, it’s a good idea to create a separate shipping zone for those orders. Add the countries you’re willing to ship to, then set your international shipping rates accordingly.
International deliveries typically take longer and cost more, so you might decide to charge something like $19.99 for a ten to fifteen business day timeframe. It’s also wise to clearly let customers know that customs duties and import taxes, if applicable, will be their responsibility.
For products that need special attention, such as heavy, oversized, or fragile items, FluentCart offers shipping classes. These allow you to assign extra costs only to the products that need them.
For example, you could have a “Heavy Items” class that adds $15 per item or a “Fragile Goods” class that adds $5 once per order for special packaging. When a customer’s cart includes multiple shipping classes, you can choose whether FluentCart adds all the extra costs together or simply applies the highest one, whichever makes more sense for your pricing strategy.
Ultimately, the goal is to make shipping clear and simple for your customers. Always display estimated delivery times, keep your pricing straightforward, and avoid hidden surprises at checkout.
Many successful stores find that building the shipping cost into the product price and advertising “Free Shipping” works wonders for conversions, even when the total cost is the same. At the end of the day, your shipping strategy should feel seamless for customers and sustainable for your business; that’s when it becomes a real driver of sales instead of just a necessary expense.
9. Customizing Your Store Design
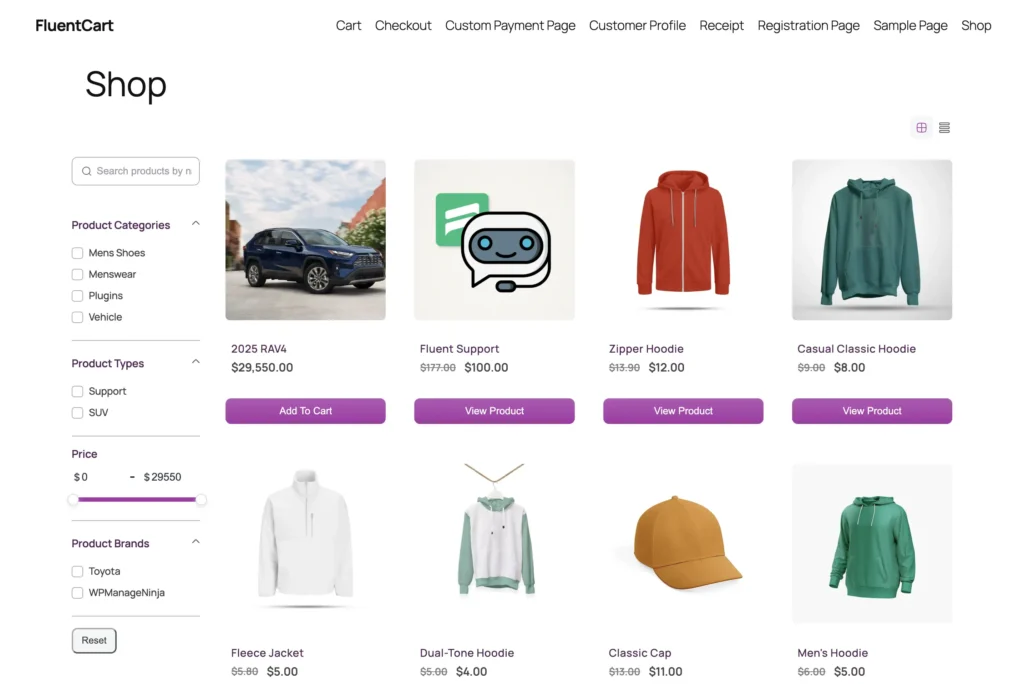
Your homepage serves as the first impression for most visitors, so it needs to effectively communicate what you sell and encourage visitors to explore your products. Create a compelling hero section with a clear headline that explains your value proposition. Include a prominent call-to-action button that guides visitors toward your shop. Use a high-quality hero image or video that showcases your products in their best light.
Below the hero section, create a featured products area that highlights your best-selling or newest items. Use FluentCart’s product display Gutenberg block to show product images, prices, and “Shop Now” buttons. This gives visitors immediate access to your most important products without requiring them to navigate through categories.
Building trust with potential customers is crucial for e-commerce success. Include trust signals throughout your site, such as customer testimonials that showcase positive experiences with your products and services. You can use a plugin called WP Social Ninja to pull reviews from social media automatically.
You can highlight money-back guarantees, return policies, or other customer-friendly policies. Make your support information easily accessible and include an about us section that tells your story.
Being consistent is key to a good impression. Customers like a good-looking brand. So, from FluentCart’s settings, you can set up theme colors globally for any FluentCart block or action buttons. You will get 6 blocks that include a price table. Yes, a well-decorated price table, and 3 action buttons for direct sale of a single product.
Use proper navigation on the navbar and footer. Try to use a sitemap as well for easy navigation. The shop page should have all the filters, including a search for easy finding. FluentCart’s product grid has that feature for you.
Try to make it clean, breathable, and easy to read with proper accessibility. This means text should not be too small or blend too much with the background to make the text hard to see. Always use a consistent size and well-contrasted color for text.
Step 4: Optimize & Prepare for Launch
Okay, your site to sell products online is almost ready. Now you have to go through some last-minute cleanup. So, these steps have the following modules that make it professional and business-ready.
10. Testing Your Store
11. Search Engine Optimization (SEO)
12. Legal and Compliance
13. Marketing and Promotion
14. Launch Preparation
10. Testing Your Store
Before launching your store to the public, do thorough testing to ensure everything works correctly. Small hiccups can interrupt the customer experience and cause you to lose business.
Start with functionality testing by adding various products to your cart, updating quantities, and removing items to verify that the cart works properly. FluentCart itself is highly optimized and tested in very rough scenarios. But your testing will eliminate unique compatibility issues.
Complete the entire checkout process using test payment methods to ensure orders process correctly and payment gateways are linked properly. I would suggest buying an item with real money to see if everything works properly.
Complete transactions and verify that order confirmation emails are sent correctly. The template is correct with the right words and spelling. I check that twice every time. Check customer account creation to ensure users can register and access their account information.
Check your site’s mobile responsiveness since many customers shop on their phones. Test all functionality on different screen sizes and ensure buttons and forms are easy to use on mobile devices. Consider the finger coverage or zone on smaller devices for placing buy now buttons.
Navigation should be intuitive on desktop, tablet, and mobile versions of your site. Review all your content carefully, proofreading product descriptions for accuracy and clarity.
Verify that all images display correctly and load quickly across different devices and slower internet connections. Yes, you need to check that as well.
Double-check pricing accuracy and ensure your navigation links work properly both on the top navbar and the footer. Review your legal pages, like privacy policy and terms of service, to ensure they’re complete and accurate. Confirm all contact information and support links are current and easily accessible.
To streamline your support, you can use a plugin called Fluent Support for free. It will give you a better and easier interface to connect with your customers in an organized way.
Technical testing involves checking your website’s loading speed using tools like Google PageSpeed Insights. Verify your SSL certificate is working by ensuring your site loads with “https://” and displays security indicators in the browser.
Confirm your backup system is running and can restore your site if needed. Test your site in different browsers, including Chrome, Firefox, Safari, and Edge, to ensure compatibility. The next phase of answering how to make a website to sell products online is kind of obvious, yet mandatory.
11. Search Engine Optimization (SEO)
Search engine optimization helps potential customers find your store when they search for products you sell on Google. FluentCart, out of the box, builds product pages with all the meta info needed for your product to be visible on Google. You already set the custom URL during the product add process.
But those are technical SEO steps. There is also on-page SEO that you have to handle. Here are a few things you might need to take care of to do so.
Optimize each product for search engines by crafting product titles that include relevant keywords customers might search for. Write unique short descriptions for each product that give a better click-through to your site. Use descriptive alt text for all product images, which helps with accessibility and provides additional optimization opportunities.
Content marketing can significantly boost your search engine visibility and establish your expertise. Start a blog section on your site and write articles related to your products.
You can create buying guides that help customers choose the right products for their needs. Share customer success stories and case studies. If you serve local customers, write in the local language. You need to optimize for local SEO by including location-specific keywords. The Yoast SEO plugin will help you write SEO-optimized content.
Set up Google Search Console to track your website performance and understand how visitors interact with your store. Submit your sitemap.xml to the Search Console so that Google understands what to crawl and index. The Yoast SEO plugin will create that for you. You need to use the Google Kit plugin to configure it.
Create a Google Analytics account and install a Google Analytics plugin to add the tracking code to your site. Configure e-commerce tracking so you can monitor important metrics like conversion rate, average order value, traffic sources, and which products are most popular. This data becomes invaluable for making informed decisions about your marketing and product strategy.
12. Legal and Compliance
Operating an e-commerce store requires several legal pages that protect your business and inform customers about their rights and responsibilities. Your privacy policy should explain what personal data you collect from customers, how you use that information, what third-party services you integrate with, like analytics and payment processors, how you use cookies, and provide contact information for privacy-related concerns.
Your terms of service should cover purchase terms and conditions, user account responsibilities, intellectual property rights, limitation of liability, and dispute resolution processes. You should be very clear about the terms of the money-back guarantee, including days in clear words and numbers, and the terms and conditions of discounts.
These terms protect your business and set clear expectations for customer behavior and your service levels. If you serve customers in Europe, you’ll need to comply with GDPR. Add cookie consent banners and provide data export and deletion options for customers.
Properly declare how you will handle the regional TAX, and if you do business globally, country-wise, in clear words. These legal terms are vital and sensitive. If needed, you can consult with a lawyer as well.
13. Marketing and Promotion
Start building an email list right from the beginning of your business. It should be your first and ongoing marketing strategy. FluentCRM not only works with FluentCart out of the box, but it is truly an excellent tool for email marketing.
Create opt-in forms using FluentForms that work smoothly with FluentCRM. And here is the interesting thing: you do not need to manually add emails. Your customers’ emails will automatically sync in the CRM customer list.
You can retarget as per their purchase history and offer incentives for subscribing, such as a discount code or exclusive access to new products. Set up a welcome email sequence that introduces new subscribers to your brand and products.
Social media integration helps expand your reach and create a community around your brand. Add social media sharing buttons to product pages so customers can easily share items they love.
Set up Facebook Pixel to track conversions and create targeted advertising campaigns. Create an Instagram Shopping catalog so customers can purchase directly through Instagram. Encourage and share user-generated content like customer photos using your products.
You should build your own community, like a Facebook group or WhatsApp chat group. If you need more control over your community in terms of communication and engagement, you can build your own social group as per your rules using FluentCommunity. I used it, and it’s actually worth trying.
You have to plan the promotional strategies to start the purchase wheel. A launch discount of 20% off first orders can attract initial customers and generate buzz. Offer free shipping for orders over a certain amount to increase average order value. Create bundle deals like “buy two, get one free” to move inventory and increase sales. Plan seasonal sales around holidays and special events.
A referral program is another great way to boost sales. It rewards customers or affiliate marketers for bringing in new buyers. These are a team of marketers on commission without a salary. You can try FluentAffiliate to manage the program smoothly.
Build relationships with influencers and bloggers in your niche who might review or feature your products. Reach out to local media if your store has a local angle. Consider partnerships with complementary businesses that serve similar customers but don’t compete directly with you.
But never try to do everything at the same time. It will easily overwhelm you. Take some time, put some effort into researching each aspect, and then gradually step in.
14. Launch Preparation
The final preparation phase ensures everything is ready for your public launch. Switch all payment gateways from test mode to live mode so you can accept real payments. Remove any “coming soon” pages or maintenance mode settings that might prevent customers from accessing your store. Submit your XML sitemap to Google Search Console to help search engines discover and index your content quickly.
If you serve local customers, set up Google My Business to appear in local search results and help nearby customers find you. Configure your backup schedule to run daily once you launch, as you’ll be processing real orders and customer data that needs protection. You can set up monitoring alerts using UpTimeRobot that notify you if your site goes down.
Prepare your content for launch day by announcing the launch on all your social media channels. Send a launch announcement email to any subscribers you’ve collected during development.
Write a press release if your story might interest local or industry media. Contact relevant journalists or bloggers who might be interested in covering your launch. Create special launch day promotions to incentivize immediate purchases and generate initial sales momentum.
Verify your inventory management systems are ready by double-checking all product stock levels and ensuring you have adequate packaging materials on hand. Set up your shipping label creation process and double-check with the delivery company so you can quickly fulfill orders as they come in.
Create an inventory tracking documentation system for your team to monitor stock levels and reorder products before you run out. Plan your order fulfillment workflow so you can efficiently process orders from receipt through shipping.
And with that, the step-by-step process of how to make a website to sell products is completed. But that’s just the initial phase. Now you have to scale the store.
Step 5: Scale & Maintain
Finally, everything is all set up and running. Now you have to start the business. Here are a few more things you have to keep in mind to really make it smooth.
15. Troubleshooting Common Issues
16. Resources and Next Steps
15. Troubleshooting Common Issues
Payment processing issues can disrupt your sales and frustrate customers. If payments are failing, first check that your payment gateway settings are correct and you’ve switched from test mode to live mode. Verify that your SSL certificate is properly installed and active. If nothing seems to be the issue, then contact your payment provider’s support team if you encounter gateway-specific errors.
Shipping problems can impact customer satisfaction and increase your support workload. If shipping rates appear incorrect, review your shipping zone settings to ensure they cover all customer locations properly. Check that your shipping methods are configured with accurate rates and delivery timeframes. Test your shipping calculator with various addresses to ensure it works correctly.
Performance issues can hurt your search engine rankings and drive away potential customers. If your site loads slowly, start by optimizing your product images to reduce file sizes without sacrificing quality. Install a caching plugin to serve pages faster to returning visitors.
If your server shows high resource usage, consider upgrading your hosting plan to handle increased traffic and processing demands. Use a CDN if you are selling globally. You can use CloudFlare or Amazon CDN if your hosting provider does not offer any. Both BlueHost and Hostinger offer CDN on professional packages.
Security concerns require immediate attention to protect your business and customer data. Check security plugins regularly for malware scans and always use strong passwords.
Monitor your orders for unusual patterns that might indicate fraudulent activity. Keep WordPress, your theme, and all plugins updated to patch security vulnerabilities. If you detect any security breaches, contact your hosting provider immediately and consider hiring a professional to clean and secure your site.
16. Resources and Next Steps
WordPress.org provides comprehensive documentation and tutorials for managing your WordPress site. FluentCart’s support documentation covers plugin-specific features and troubleshooting. Stay current with e-commerce trends by following industry blogs such as.
You can also join WPManageNinja communities, where you can ask questions and learn from experienced business owners. Lots of YouTubers make videos on advanced topics on WordPress and site management in general.
Useful tools can streamline your operations and improve your marketing efforts. Canva helps you design professional graphics and banners for your store and social media. Google Analytics provides detailed insights into your website performance and customer behavior.
Microsoft Clarity shows you how users interact with your site through heatmaps and session recordings. Buffer allows you to schedule social media posts across multiple platforms. Grammarly helps ensure your product descriptions and content are error-free and professional.
Continue learning by taking advanced WordPress courses that cover topics like security, optimization, and advanced customization. Study digital marketing to improve your ability to attract and convert customers. Analyze successful e-commerce stores in your niche to identify best practices and opportunities.
Attend webinars and conferences to network with other entrepreneurs and learn about industry trends. Join entrepreneur communities where you can share experiences and learn from others facing similar challenges. We got the answer to how to make a website to sell stuff online, but at what cost? I mean, how much will it cost me?
Costing
You might be wondering, How much does it actually cost? Is it going to run into thousands of dollars? Well, not really — and I’m talking just about building the site to sell your products, not the entire business development costs.
If you used WordPress, the free version of FluentCart, and the Twenty Twenty-Five theme, my setup cost me zero dollars. Plus, all the other tools I mentioned have free versions with no time limits. Plugins are all open-source.
The only real expenses are your domain name, which can range from around $10 to thousands, depending on how premium the domain is, and hosting, which typically runs between $3 and $20 per month.
So, what’s the answer to “How much does it cost to make a website to sell stuff?” It really depends on how much you want to spend on your domain and hosting. Can you build a website to sell stuff for free? Almost, you just have to cover those basic costs.
Conclusion
Congratulations! You’ve successfully built your e-commerce website using WordPress, FluentCart, and the Twenty Twenty-Five theme. Your store is set up with secure payment processing, product management, and customer communication tools.
Remember, e-commerce success is a continuous journey. Keep learning, stay adaptable to new trends, and experiment with different marketing, product, and service strategies. Make sure you stay updated with WordPress, your plugins, and industry best practices.
Focus on offering great products, delivering excellent customer service, and building trust through transparency and reliability. The real growth happens over time as you refine your operations, strengthen customer relationships, and consistently provide value.
That’s it. We’ve covered all the key aspects to answer the question: how to make a website to sell. Every top online store started exactly where you are now. Stay dedicated, keep improving, and your business can thrive.
Related Articles and Topics
-

Best Dropshipping Niche: What’s Your Best Bet
We’ve listed 5 best dropshipping niche picks. But understanding a niche matters more than picking one. Here’s the…
-
Best Free eCommerce Business Course Options
Five hand-picked eCommerce courses that are genuinely free, plus one faster way to learn that most people skip.
-
The Best Business in the World You Need To Know
A list of the best business in the world. Five of the 14 giants below started exactly like…
-
eCommerce Data Ownership: Why Your Customer Records Decide Who Survives 2026
Your store does not own its customers. Right now, today, in June 2026. And the platforms hosting your…
-

FluentCart vs Lightspeed: Which One Fits Your Store in 2026?
FluentCart vs Lightspeed: an honest and in-depth look at pricing, fees, and fit. Find out which suits your…
-

Best Products to Sell on World Cup 2026 + Build Your Store Fast
Discover the best products to sell on World Cup 2026, from fan apparel to drinkware, and how to…
-
How Much Is My Business Worth? Business Valuation
Learn how to value your business using SDE, EBITDA, and market comparables. Practical methods to calculate what your…
-

What Is a Persona: Meaning, Types, and How to Build One That Actually Works
A persona is a research-backed, semi-fictional profile of your ideal customer, specific enough to make decisions around.
-

How to Sell Online Courses With WordPress: The 2026 Setup
The LMS plugin you have leaned on for years just changed hands again, the cart you bolted on…


Leave a Reply